Follow the steps below to set up the customer portal.
Step 1: Enable the Customer Portal for the Project
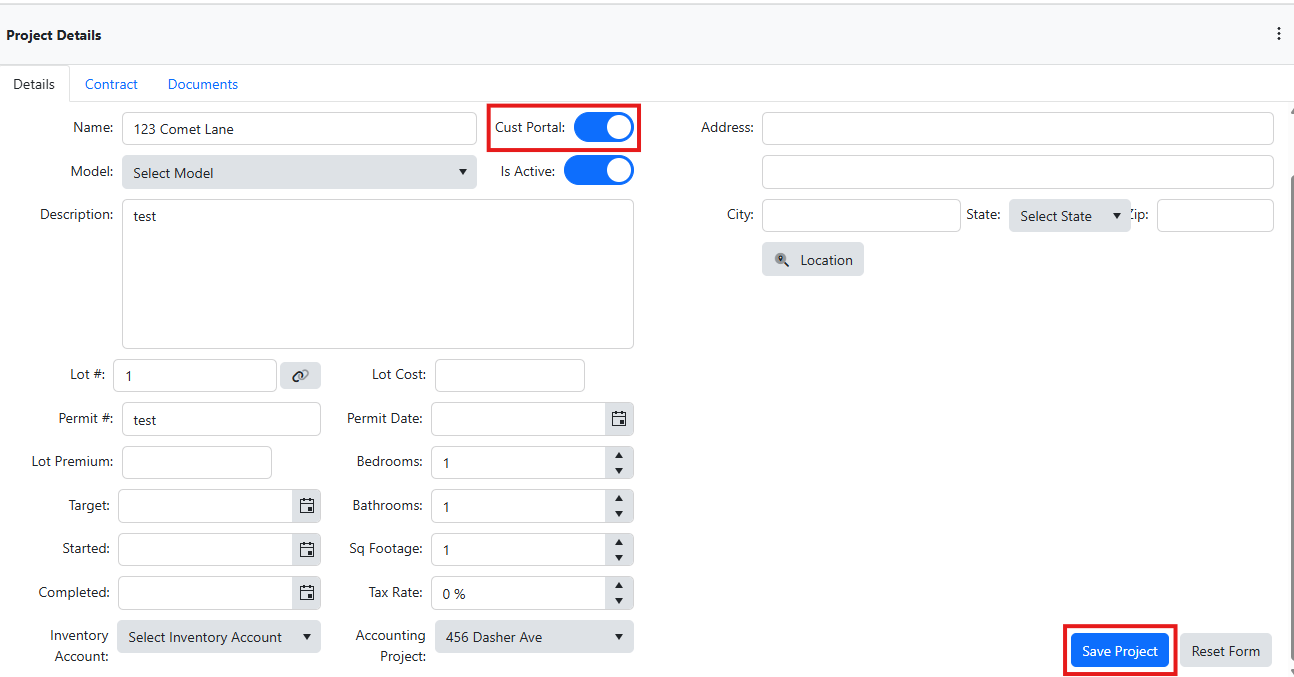
Begin by navigating to the project and toggling the Cust Portal field on. Then save the project.
Step 2: Add Customers
Create or update project customers and mark them as active to grant access to the Customer Portal.
➡️ See the “Creating a New Customer” video for guidance.
Step 3: Add Customer Tasks
Assign customer tasks and provide customers with the ability to view, track, and complete them through the Customer Portal.
➡️ See the “Creating a Task” video for guidance.
Step 4: Share Documents and Photos
Share select project documents and photos with the customer through the portal.
➡️ See the “Sharing a Document with a Customer” video for guidance.
Step 5: Add Recent Activity
Provide recent activity updates to keep customers informed about the progress and status of their home.
➡️ See the “Adding a New Activity” video for guidance.
Step 6: Add Customer Contacts
Provide key contact information for the individuals customers should reach out to when assistance is needed.
➡️ See the “Creating a New Customer Contact” video for guidance.
Step 7: Add Customer Selections (if needed)
Enable customers to make and manage their selections directly through the Customer Portal.
➡️ See the “Creating Customer Selections” video for guidance.
Step 8: View the Portal Preview
At any point along the way you can review a preview of the customer portal through the Portal Preview.
➡️ See the “Viewing the Customer Portal Preview” video for guidance.
Was this article helpful?
That’s Great!
Thank you for your feedback
Sorry! We couldn't be helpful
Thank you for your feedback
Feedback sent
We appreciate your effort and will try to fix the article